Construction, deconstruction, reconstruction

One of my favorite strategies when meal planning is to deconstruct or reconstruct to make a favorite meal slightly different. This allows us to keep the flavors that we love but change up the way we consume them, to add variety to our weekly menus.
The key players, a.k.a. what you will need
- Naan
- Hummus (Homemade or store bought)
- Tzatziki (Homemade or store bought)
- Greek dressing (Homemade or store bought)
- Lemons
- Chicken breasts
- Garlic
- Red and green bell peppers
- Red onion
- Grape tomatoes
- Cucumbers
- Black olives
- Feta cheese
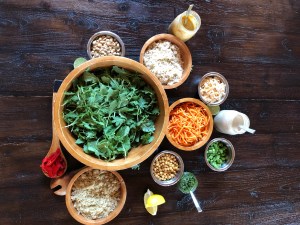
Mise en place
The teacher in me loves French words! The foodie in me loves them even more when they refer to food or cooking. Mise en place is a French term used to describe the set up required before cooking. This means, prepping and having everything ready to go for when you start cooking.
We’re going to do a little mise en place here to set you up for constructing, deconstructing and reconstructing Greek Chicken Wraps.
Sauces and dressings
In this case, hummus, tzatziki and greek dressing. You can go store-bought all the way, or homemade. It really doesn’t matter. Use what is convenient, use what you like.
Hummus: I always like to make my hummus from scratch. My go-to for years, has been Real Simple’s 5-Minute Hummus. It never disappoints. Simple ingredients, whips up in five minutes. I love adding a bit of harissa to it for a spicier version.
Tzatziki: Making homemade tzatziki is not difficult and requires few ingredients: Greek yogurt, cucumber, garlic, lemon, salt. Do I love grating and squeezing out the cucumber for this recipe? Not really. Do I have time for that? Not really. I usually go store-bought on this one, because I love the flavor and thickness of PC brand Tzatziki. (Not an ad, it’s just one of my faves!)
Greek Dressing: Whichever dressing you choose to use, use it to its full potential: as the salad dressing and as the marinade for the chicken. Again, the ingredients are so simple that I like to make this one myself. One part lemon juice, two parts olive oil, oregano, salt & pepper and garlic. I like to use a bit of garlic powder in the dressing (maybe 1/4 teaspoon), then add a couple more cloves of fresh garlic to the chicken while in marinates. The fresh garlic is a bit too harsh for the dressing, I find. I also like to zest the lemons before juicing and add that to the chicken marinade as well. This lemon herb marinade also works well, but has a few more ingredients.
Chopping and cooking
Salad: Chop all your veggies, add feta and dressing and you’re done. One thing I like to do is switch up the size of the veggies, depending on what I’m making. A chunkier greek salad is really stands out on the mezze plate, whereas a smaller, diced greek salad works well in a wrap.
Chicken: I went all sheet pan dinner on the chicken, because it’s just too easy not to. I sliced each chicken breast into about five fingers, so they would cook faster, marinated for about half an hour, spread out on a parchment covered baking sheet and baked at 425 degrees F for 25 minutes. So basically while your chicken is cooking, you’ll have time to prep your salad.
Naan: I love how pillowy soft the naan gets when it’s warmed up. I just popped it in the oven on a sheet pan for five minutes while the chicken was cooking, to make it pliable enough to contain the wrap ingredients. For the mezze plate, I brushed it with olive oil and sprinkled it with salt, and baked it a little bit longer to give it some color and to hold up to dipping in the thick tzatziki.
Construction – Greek Chicken Wrap
Now that you have your mise en place ready to go, you can build your wrap.
- Spread hummus or tzatziki (or both) on your warmed naan.
- Fill with chicken, top with salad. (You can also add some lettuce to the wrap for some filler.)
- Eat it taco-style.
Variation: Try roasting some of the salad veggies (peppers, red onion and olives) with the chicken. Top with cucumber, tomato and feta and a drizzle of dressing.
Deconstruction – Greek Mezze Platter
Deconstruction is usually the easiest method to use when trying to change up your meal plan because all the ingredients are already ready.
- Spread the hummus and tzatziki on a plate or shallow bowl.
- Top with chicken pieces, salad, and naan triangles.
Reconstruction – Greek chicken pizza
Reconstruction is probably the most difficult and labour-intensive of the three processes we just covered. You may need a few extra ingredients in order to create something slightly different. In this example, I’ve used most of the same ingredients, but prepared them differently.
- Use a piece of naan as your crust and lightly brush it with olive oil.
- When cooking the chicken, throw on a couple whole cloves of garlic and some grape tomatoes so they roast up nicely.
- Spread the roasted garlic over the naan, the smash some tomatoes over it too.
- Top with chopped chicken, peppers, onion, olives and feta. (You could use raw or roasted veggies here.)
- Grate a bit of lemon zest over the top.
- Add a bit of mozzarella if you like your pizza extra cheesy.
Variation: You can go vegetarian on all of these by simply omitting the chicken.
Apply this method to another meal
Now that you know what to do, try this method with another meal. Check out these dressings, marinades or five things you could make for supper that may fit into your construction/deconstruction/reconstruction plan.
Have you tried this method? I love to hear your ideas! Comment on this post or email me at info@toobusylivin.com
 Lunch bowls are a combination of greens, grains, soft veggies, crunchy veggies, dressing or sauce and a crunchy topping.